サポート対象外でアップデートされなくなった端末に試しにインストールしてみたので実施結果と備忘録です。
結論として、音が出ない、一部設定内容が再起動時にまたデフォルトに戻ってしまうなどの症状がでてしまい、常用はできない結果となりました。しかしどんな雰囲気のOSなのか試しに使ってみるといった目的には使えるかと思います。
(Chromeには蓋を開けてネジを外さないと他のOSが正しく(あるいは全く)インストールできないという情報もありますが、今回はそこまで試していない中でのトライとなります。)
手順/サポート
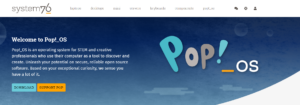
Installing Pop!_OS – System76 Support
上記ページにPOPOSのインストール手順書があります
方法
Chat GPTに聞くととだいたいやりかたを教えてくれましたので後述しますがざっくりした手順は下記です。POP OSのダウンロードもとだけ書いておきます。
- POP OSをダウンロード
- イメージファイルをUSBなどに焼く(SDカードだとうまくいかずUSBで実行しました)
- ChromeOSで開発者モードを有効にする
- インストールしたいPCでブート元とUSBにして起動
①POP OSをダウンロード

NVIDIAを選ぶのはNVIDIAのGPUを搭載されているPCにインストールしたい場合のようです。ダウンロードしたイメージファイルをUSBなどに焼くのは過去に掲載しましたこちらのツールで実行でいます。
下記はChatGPTに質問してでてきたインストールの進め方です。
基本的にほぼすべてあっているように感じましたが自分の手順でうまくいかず別の方法をためしめしたところは追記しています。便利な時代になりました。。
以下GPTに聞いたときの返答ベースの手順
1. Enable Developer Mode
- Turn off the Chromebook.
- Press and hold the
Esc+Refresh(F3) keys, then press the power button. This enters Recovery Mode. - Once in Recovery Mode, press
Ctrl+D. You’ll see a screen asking you to confirm that you want to turn on Developer Mode. - Press
Enterto enable Developer Mode. This process will take a few minutes and will wipe your local data.
2. Enable Booting from External Media
- After your Chromebook restarts, press
Ctrl+Dat the warning screen to boot into ChromeOS with Developer Mode enabled. - Open a terminal in ChromeOS by pressing
Ctrl+Alt+T. - Type
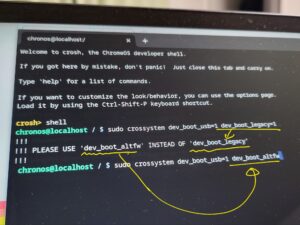
shellto get a full bash shell. - Type
sudo crossystem dev_boot_usb=1 dev_boot_legacy=1to enable booting from external media.→ここだけ、下記のように訂正されますので書き直します。
3. Prepare the Linux Installation on an SD Card
- On another computer, download the Linux distribution ISO you want to install. For a Chromebook, distributions like GalliumOS, Ubuntu, or Debian are recommended because they’re lightweight and compatible with Chromebook hardware.
- Insert the SD card into this computer.
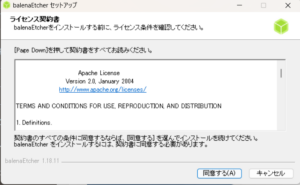
- Use a tool like
balenaEtcher(available for Windows, macOS, and Linux) to flash the ISO file to the SD card. This will make the SD card bootable.
ここで、最初はSDカードで試しましたがうまくChromebookが読み込んでくれないためUSBでためしました。
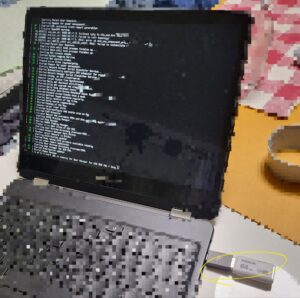
4. Boot from the SD Card(USBカード)
- Insert the SD card into your Chromebook.
- Reboot the Chromebook and press
Ctrl+Lon the developer mode screen to boot from the SD card instead of the internal storage. - You may need to press a key to select the boot device. Choose the SD card.
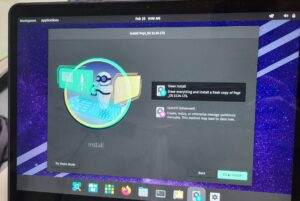
5. Install Linux
- Follow the on-screen instructions to install Linux from the SD card to your Chromebook’s internal storage. Be cautious during the partitioning step—if you’re not sure, seek out a specific guide for your Linux distribution and Chromebook model.
- Once installed, remove the SD card and reboot. You may need to press
Ctrl+Lagain to boot into Linux from the internal storage.
Important Considerations
- Backup Data: Your data will be wiped during this process. Backup any important files before you begin.
- Battery Life: Installing a different OS may affect battery life and performance.
- Functionality: Not all Chromebook features may work in Linux, such as touchpad gestures or function keys, without additional configuration.
- Recovery: Keep a ChromeOS recovery drive handy in case you need to revert to the original operating system.
For specific models like the Samsung Chromebook Pro, it’s highly recommended to search for model-specific guides or forums (such as the GalliumOS subreddit or Chromebook-specific forums) for any nuances or additional steps required.
参考になれば幸いです。